Following on from our recent guide to replacing the front brakes on our Project GTi with some uprated
EBC items it's now time to move on to the golf rear brake discs and pads
.
Here's our golf rear brake discs and pads replacement guide:
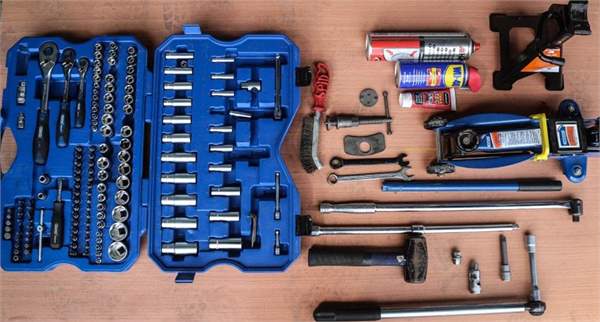
What you'll need:
We should point out straight away that this job is a bit trickier than doing the front brakes and requires a couple of specialist hand tools that you may not have in your toolbox, namely the first two product in the list below:
How long will it take?
If you have never replaced Golf Rear Brake Discs and Pads before you will need some help.
With two people it will take roughly 1-2 hours per side. This will also vary depending on experience and the equipment you have. If you have the luxury of a ramp/lift the job will be much quicker and easier than with axle stands. A second pair of hands will be a huge help. We recommend working with a friend, not only to make the job easier but also for safety reasons.
Getting started:
Carfully Raise and Support the car on rigid axle stands, rated to support the vehicle weight. Position the stands carefully to avoid damaging the undercarriage of the car. You'll want the car quite high to get greatest leverage on the M14 caliper carrier bolts. (they're extremely tight)
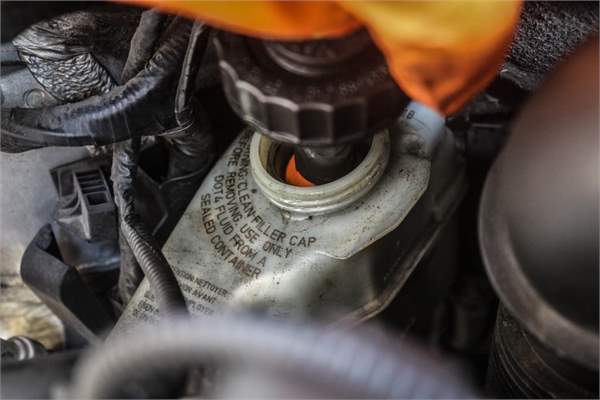
Before you start working on the brakes check the brake fluid. You will find this in the master cylinder reservoir. If it is full to the top you may want to remove some of the fluid; enough to drop the level by 40-50%. Why would you do this? If the reservoir is too full, compressing the caliper pistons may push brake fluid back out. The cap at the master cylinder reservoir will leak, allowing it to spill on the body where it may damage the paint. Recheck the fluid level after the brake job is complete, and top it off, if needed.
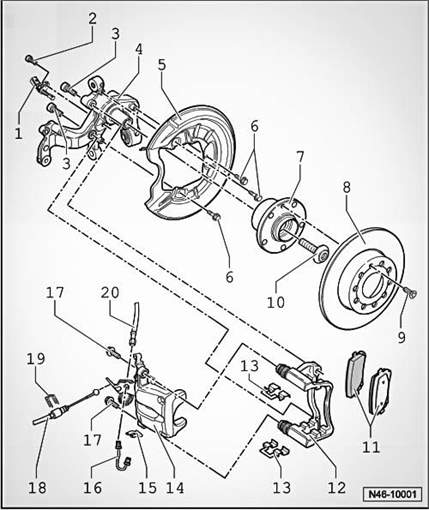
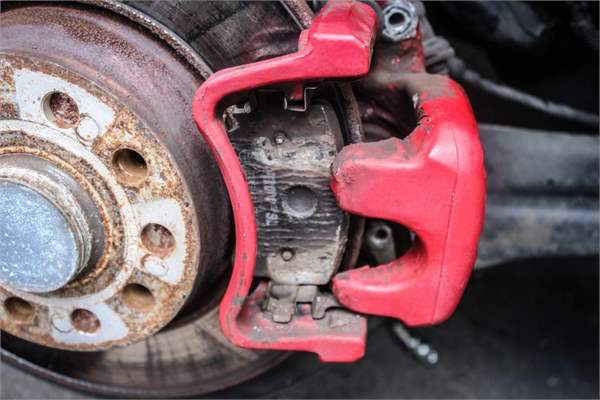
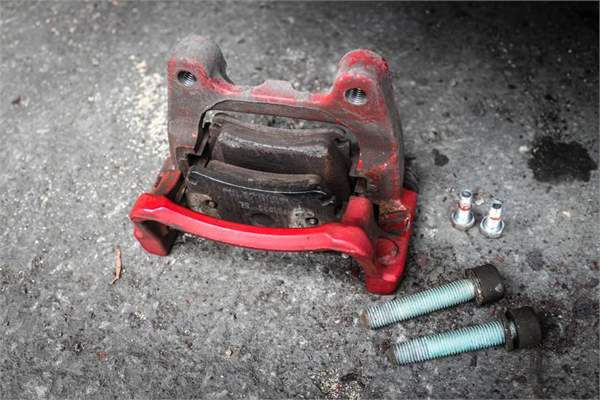
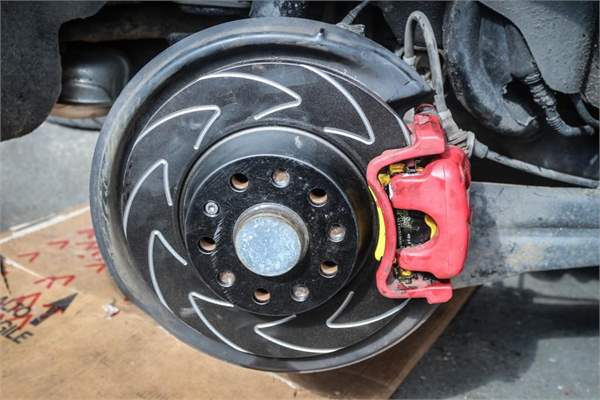
Step 1: Remove the brake caliper.
Make sure the handbrake is off before you start to tackle removing your Golf rear brake discs and pads . You need remove the caliper from the caliper carrier. You do this by undoing the two M8 (13mm spanner) slide pin retaining bolts. The guide pins will probably turn when you try to undo the bolt so use a 15 mm spanner on the slide pin. The caliper should slide off without too much fuss. It may still need some gentle persuasion with a pry bar or flat blade screw driver. Place your choice of tool between the caliper and the carrier. Be extremely careful to stay clear of the rubber seal around the caliper piston.
.
Next pry the brake pads from the caliper carrier using a flat bladed screwdriver. Support the weight of the caliper with a bungee cord to avoid putting strain on the brake hose.
Remove the caliper carrier before can remove the brake discs. The photo below shows you need a 14 mm triple square driver and long extension. Removing these two bolts is the toughest part of the job as they are tight and awkward to get to.
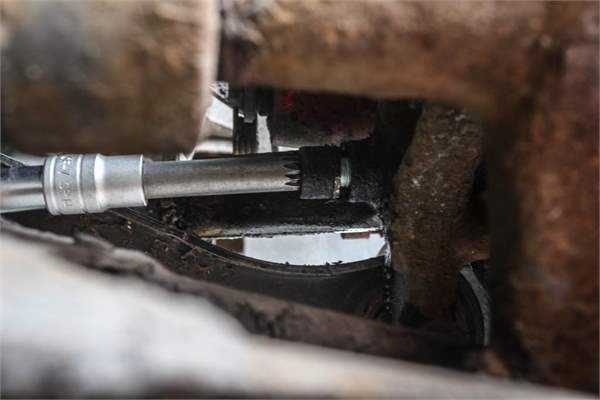 We had to use 3 extensions. A universal joint and a 600mm long breaker bar. We threaded them between the upright, shock and anti-roll bar. You'll also need a LOT of force to get them undone!
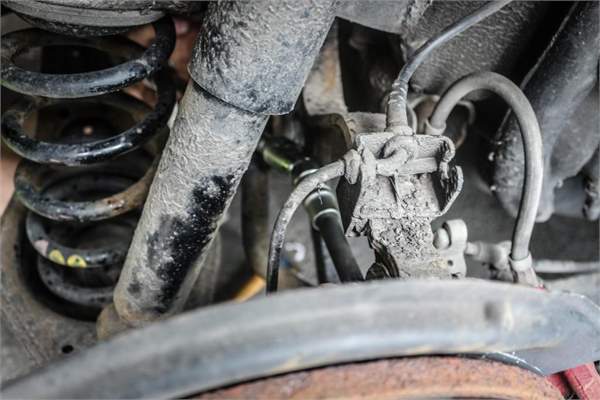
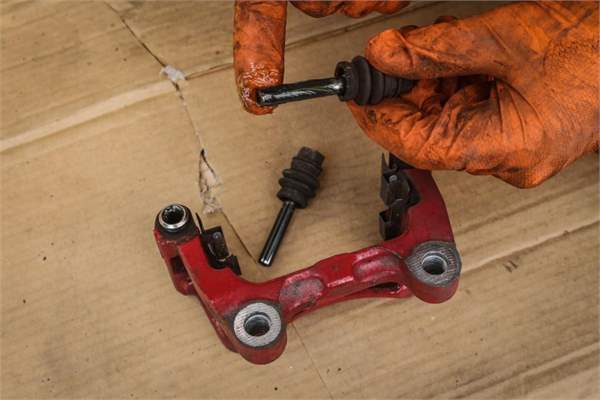
Once you have them undone, remove them completely and remove the caliper carrier
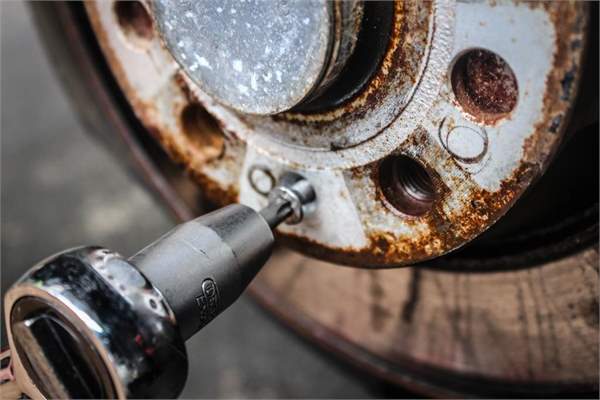
Remove the brake disc:
Remove the small locating screw on the disc.
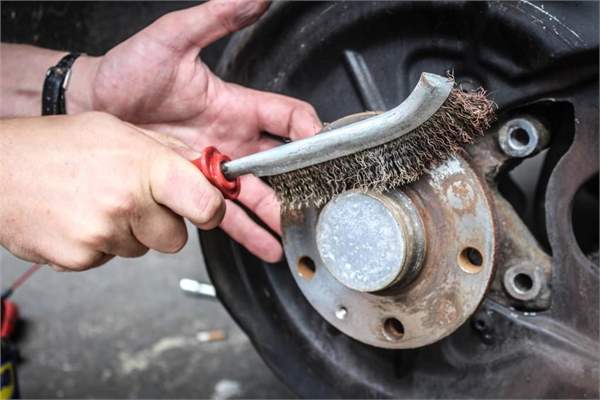
Give the surface of the hub a good scrub with a wire brush or sandpaper. Make sure you clean the caliper, carrier and the new brake disc with brake cleaner
 Fit the new disc and the retaining screw. Apply a small amount of brake assembly lube (Mintex Ceratec is ideal) to the guide pins. You can also apply this to the brake pad sliding surfaces. Reinstall the brake caliper carrier. Torque the attachment bolts to 90 Nm (66 ft-lb) plus 90 degrees.
Refitting:
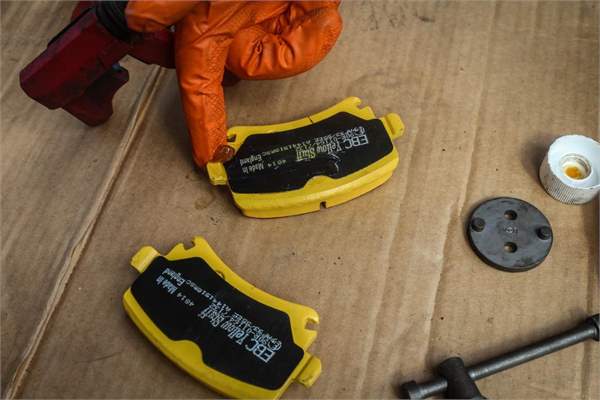
Install the new pads, being careful not to get any oil or greasy fingerprints on the brake friction lining. Press them tight against the disc.
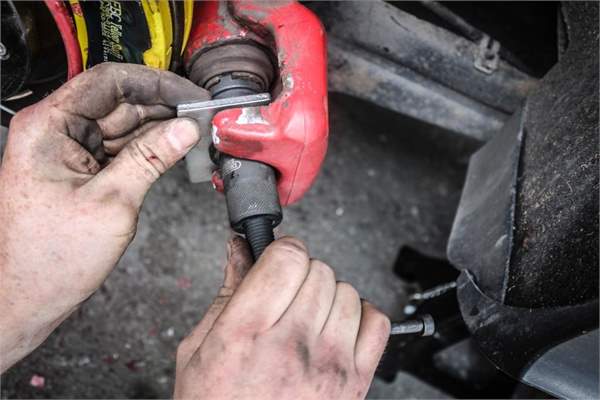
 To reinstall the caliper you're going to need a special Volkswagen/Audi Group (VAG) caliper wind-back tool. The piston in the caliper does not simply compress, it winds back into the caliper on a thread.
 We used the Draper Expert 18 piece caliper wind back tool kit which has an assortment of different adapters to suit a wide range of cars with kind of caliper set up
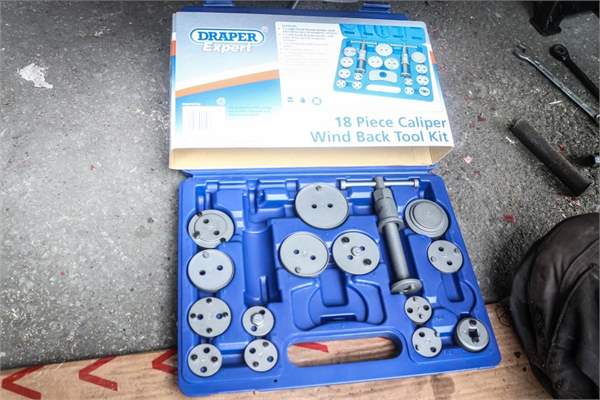
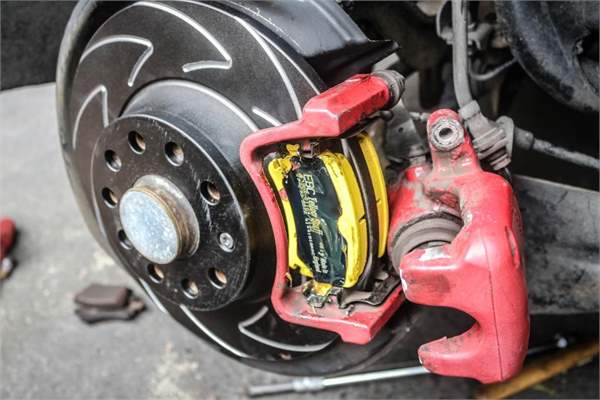
When the caliper piston retracted the caliper should slide over the disc. Align the holes in the caliper carrier with the slide pins. Push the M8 caliper bolts through the caliper carrier holes. Next screw them into the slide pin threaded holes. Hold the slide pin hex with a 15 mm open ended spanner and tighten the bolts with a 13 mm socket. Grab the torque wrench and tighten to 35 Nm (26 ft-lb)
 Reinstall the road wheels and torque the wheel bolts, tightening in a star pattern to 120 Nm (89 ft-lb). Make sure the cap on the brake fluid reservoir in the engine bay is on securely
It's very important, after lowering the car and reinstalling the road wheels to pump the brake pedal several times to properly position the caliper pistons against the pads. Also check the handbrake operation, both apply and release. Once everything is ok there, check and top up the fluid level if required.
Reinstall the road wheels and torque the wheel bolts, tightening in a star pattern to 120 Nm (89 ft-lb). Make sure the cap on the brake fluid reservoir in the engine bay is on securely
It's very important, after lowering the car and reinstalling the road wheels to pump the brake pedal several times to properly position the caliper pistons against the pads. Also check the handbrake operation, both apply and release. Once everything is ok there, check and top up the fluid level if required.
Repeat the same procedure for the other side .
Click here for more articles in the Project GTi series
Bedding In:
New brakes need to be ‘bedded in’ and will not work at 100% of their capacity from the very beginning. Exercise extreme caution the first few times you press the brake pedal. The braking performance may be less than you were expecting. It’s also like that you’ll experience more brake noise than normal the first few times you stop. Give protective coating time (if applied) to wear off. here are EBC’s own detailed bedding in instructions:
In Street use situations. Bedding in brake pads with the red EBC surface coating applied (marked on the pads as Brake In). Best procedure is to drive avoiding harsh braking unless in an emergency for first 100 miles. In the second 100 miles (up to 200) you can use increasing brake pressures when using the brakes.
Only after 200 miles urban driving (not 200 miles on a freeway where brakes are almost unused) . You can attempt to apply heavy load and heat to the brakes. To do this final bedding on a QUIET ROAD in safe traffic apply the brakes and slow from 60 to 10 MPH five times in a row. Then drive for a few minutes if safe to do so to allow the brakes to cool. While the brakes are hot try to avoid coming to a rest.
You will notice a smell from the warm brakes, this is normal. Repeat this procedure a second time after the brakes have TOTALLY cooled down. EBC pads get better with miles. Even after this bed in procedure it can take up to 1500 miles before the pads are at their best. In the meantime the pads will be good and safe but true potential not realised. EBC makes performance pads that last, they do not bed in within 5 minutes driving. Noises will be more likely during the first 1000-1500 miles. This will occur whilst this chemical bedding takes place.
NEVER attempt to sand or scotchbrite brake pads to assist it bedding in or noise reduction. The only way to seat pads is against the rotor they will be used on and by following our bedding recommendation.
We remind you there is NO WARRANTY on any EBC product for race use due to the very varying conditions. Yet, care bedding pads in and monitoring wear will get the best from our products.
Most EBC pads including Yellow range pads now have the brake in coating. If possible and using a street based car, fit the pads before the race use and bed in as above for street use. Try to get 200-300 miles urban driving on the pads before racing them. If this is NOT possible and you fit at the track bed like this.
Drive two laps applying the brakes every few seconds. Affter coast for a full lap without any unnecessary braking to allow pads and rotors to cool down. Drive a third lap applying the brakes harder each time and again drive a cooldown lap. Do NOT pull up and park the car with the brakes red hot, try to let them cool as much as possible before coming to a rest. It is also important to match the pads to the rotor. This is before they will bed in .
If you do the above bed in and get violent fade first use you MUST repeat the bedding procedure. We get lots of new customers calling in saying my brakes have faded. They send a digital photo the pad is only touching on 70-80% of its surface area. Fade early in a pads life is almost a good thing. That,s called GREEN fade and will disappear, so if you suffer Green fade , you are on the right path. If you are getting fade after 20 laps and the pads are part worn, then something else needs looking. It could be material choice, bleeding of the system, driving style etc …


